2nd December 2016
AIM
To explore our construction ability by building bridges linking our community maps together.
I set the children a task last week to draw a building they could see from their house or school, in as much detail as possible. I asked the children to show me their drawings and identifying various buildings. I was quite astounded at the level of detail that the children produced. It was clear that much time had been spent outside of school hours creating their beautiful drawings.
The children worked so well in small groups creating their maps that I suggested that they continue to work in this way. Each map was so different so different that all together it looked like a very large city. I asked them to link all of the maps together by building bridges using some very basic art materials used in the everyday classroom like cellotape, string, wool, masking tape, straws, scissors, lollipop sticks, pipe cleaners and textured papers and corrugated cardboard. We were moving from 2D drawing to 3D construction for the first time.
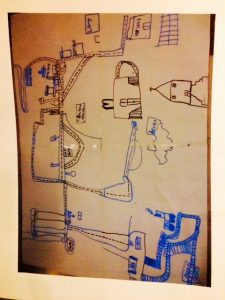
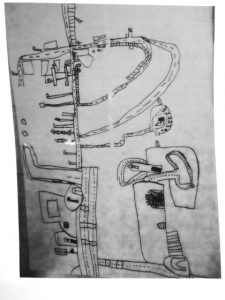
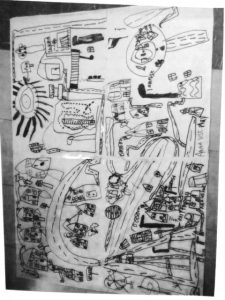

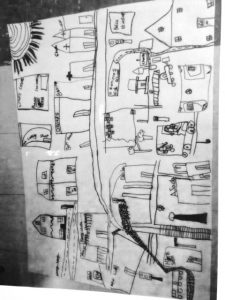
(I had some fun putting these maps through different filters)
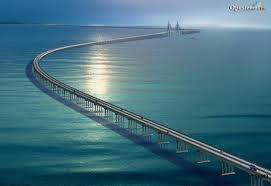
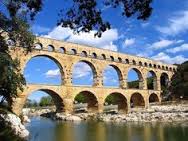
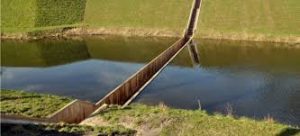
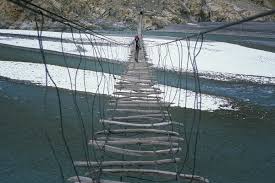
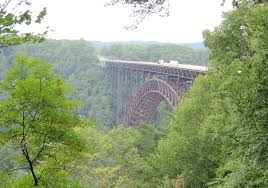
Prior to embarking on the building of the bridges we looked at different bridges from across the globe. I thoroughly enjoyed sourcing these images and I was inspired by the construction, engineering, array and history of bridges that I came across.

The bridges required thinking, designing, experimenting and building. In their small groups they placed their maps flat on the tables. The desks needed to be moved a little to accommodate a bridge that the children built connecting the maps together. The bridges were about 2ft long which allowed enough room for the children to stand between the desks. The spaces between the desks were seen as rivers separating the maps/land.
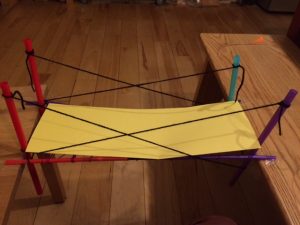
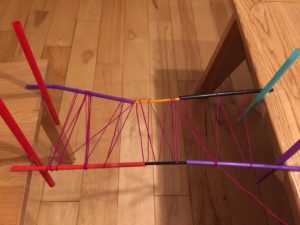
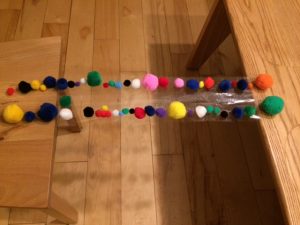
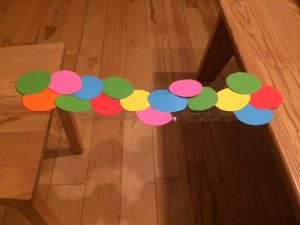
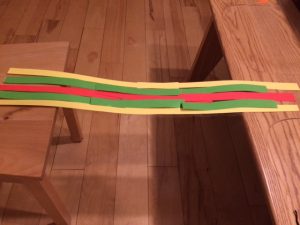
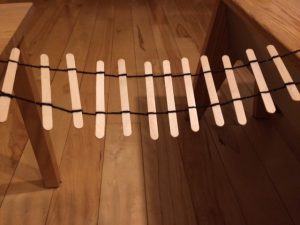
I had also created a number of bridges myself from the same materials on offer to the children to give them some ideas of how and what to construct from. They could make the bridges from all, some or even just one of the materials on offer. It was possible for a bridge to be made completely of just one of the materials. Some could be really simple and other could be quite complex but with lots of cello tape available anything was possible. They needed to stick the bridges onto the tables not onto the maps themselves.
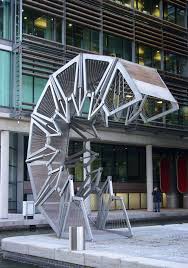
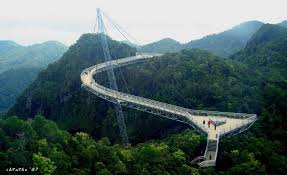
My favourite bridge (Snail like) a pedestrian bridge in London
Here a roaming camera would have been ideal as I struggled to actually see what the children were building. As the bridges needed to be stuck down onto the tables the children could not bring their constructions up to the camera to show me. It was fantastic to observe how quickly the children worked and they didn’t seem to be phased by the challenge to build and design in 3D.
It was only when Ms Harriot emailed the images of the bridges that I could see the detail of the engineering and skill that the children. I was amazed at what the children created. They were so inventive and with such speed also. I am going to allow the children to upload the images of their bridges at this stage as my images of their bridges do not do them justice.
In planning ahead for next week I am seriously considering moving into 3D construction at a very large scale in response to the skill level of the children in this session.