Wednesday 7 June, 2017.
Helen’s “real” visit and the last VT session of the school year.
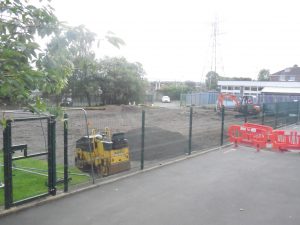
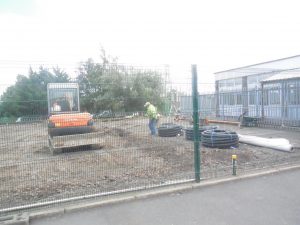
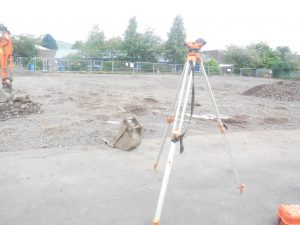
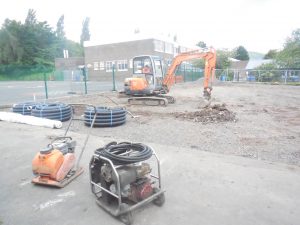
We went outside to look for signs of Summer, and to inspect the contractor’s work in our grassy area in front of the Dinner Hall. The grass has almost disappeared, as there is going to be a fabulous adventure/play and learning area constructed within the next 14 weeks.
As we returned to our classroom we spied Helen coming towards us with what looked like a very heavy bag. The children were delighted to greet her. When we got to the classroom we told her what we had been doing outside, just before she had arrived. She said that she was thrilled to see that the willow shoots had taken so well and that they had already produced lots of leaves!
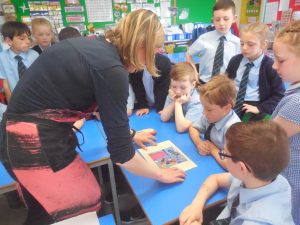
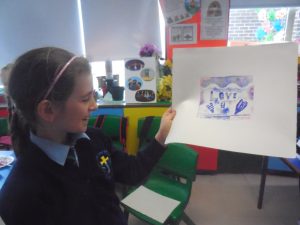
Cliodhna showed Helen the book she had made about her family.
We asked Helen about her journey. She told us that she had an early start, but managed to sleep on the train. Reuben is at school and Samhrain is at Nursery today.
Then we talked for a short while about what was going to happen in the session.
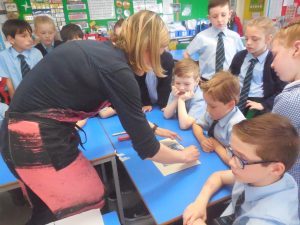
Break time arrived. When the children went out to the playground, Helen set to work. She opened her Mary Poppins bag and a variety of exciting things were brought out.
She took out the fabriano paper (very expensive and Italian) and dampened it with a water filled sponge. Making the paper moist is crucial to the printing process, as this will help the ink to be absorbed evenly. She had blotting paper to absorb some of the water. She put the sheets of dampened paper back into a bin liner in preparation for the return of the children.
Then the inevitable happened…………………ALL the chairs had to be removed and ALL the tables had to be reconfigured. Thanks once again Helen!
Just enough time for a very fast cup of tea, and the children came back.
A RECAP of what we did in the last session:
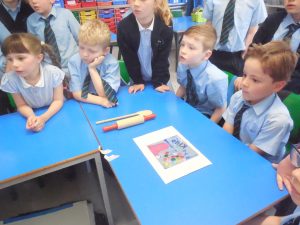
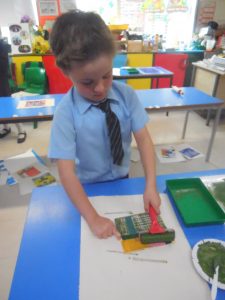
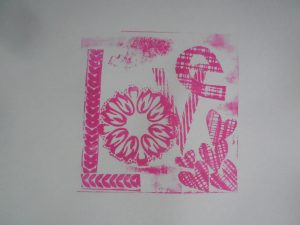
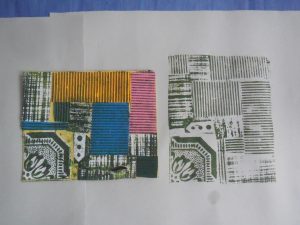
Everyone made a plate in preparation for the collagraph printing.
- What is a collagraph? It is a collage of textured materials on a plate for printing.
- Collagraphy is a printmaking process in which materials are applied to a rigid substate – board or wood.
- Collagraph comes from the Greek word koll or kolla, meaning glue, and graph means “the activity of drawing.” The resulting print is termed collagraph/collograph.
Helen wanted to demonstrate the printing process to the boys and girls.
First things first.
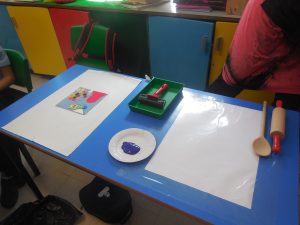
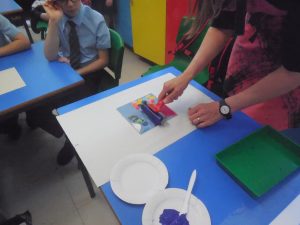
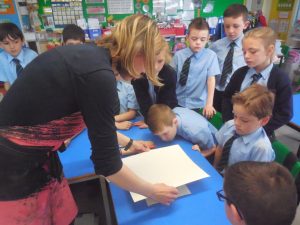
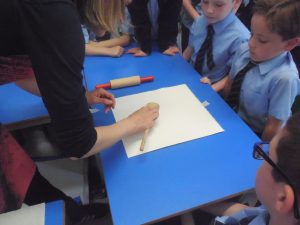
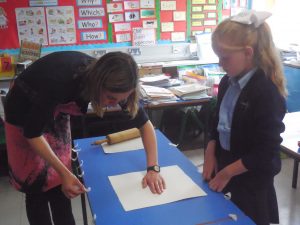
She put on her apron, and prepared a table…….I mean “station.”
- Her “plate” was placed on the table. She had shown this to us in our last VT session.
- Next came a roller and a tray to hold it.
- Then she put some blue ink a plate (a paper one) with a plastic knife.
- She put an A3 sheet of paper on the table, and covered it with a sheet of sticky-backed acetate/plastic.
- Finally a rolling pin and a wooden spoon with a flat side were placed on the table too.
I asked Helen if we could use paint another time as a substitute for ink. She replied that the ink is thick and sticky and ideal for the job, and that paint would not be at all successful. She said that each large tube of ink costs about £8 and lasts for quite a long time.
(1). Set-up preparation.
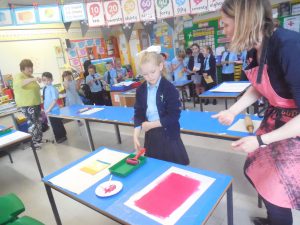
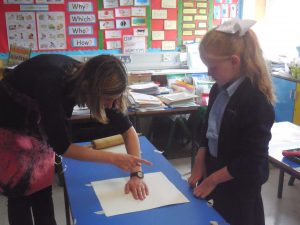
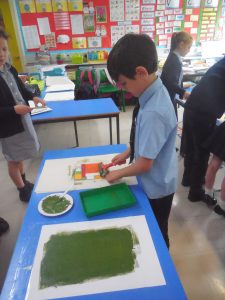
(2). Helen spread the ink on to the A3 sheet and rolled it to cover a large portion of the paper.
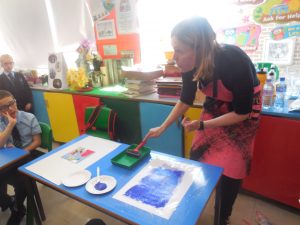
(3). The instruction was: Roll the ink onto the paper, not the desk!
(4). Make sure there is enough ink on the paper.
(5). Roll the ink onto the plate.
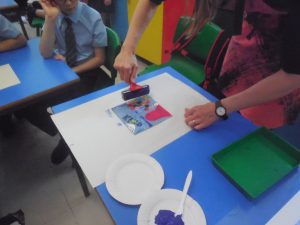
(6). Make sure all the raised surfaces are covered with ink.
(7). Move the inked plate onto the table……..”station” for printing.
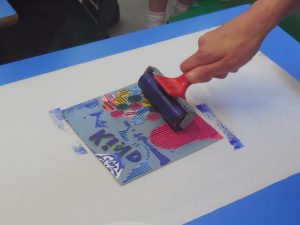
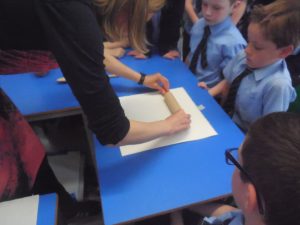
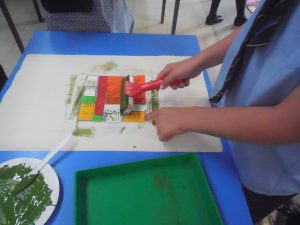
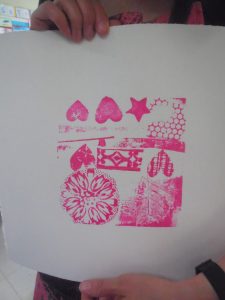
“Just a minute………………while I get the fabriano paper.”(It’s Italian, and very expensive you know!)…………..It costs £4 per sheet, but you can get 6 pieces from each sheet.
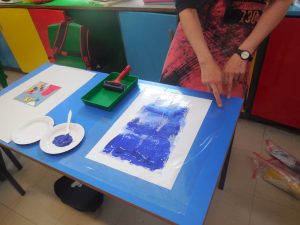
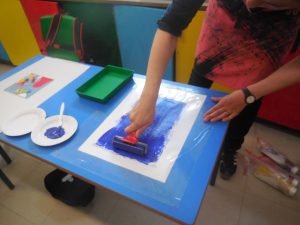
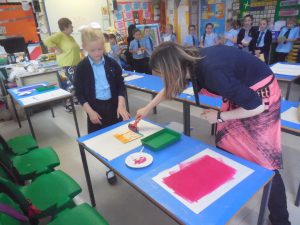
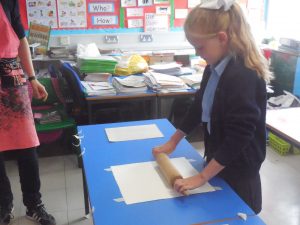
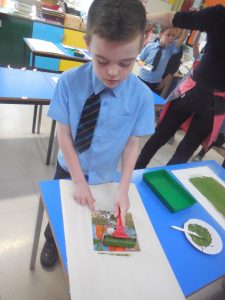
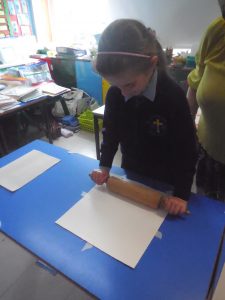
(8). Carefully put the fabriano on top of the plate and secure it to the table with tape on four sides.
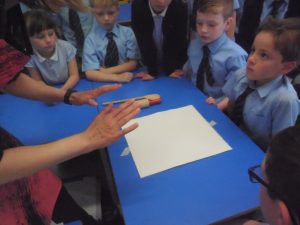
(9). Rub the paper gently with a flat bottomed wooden spoon, or….
a rolling pin.
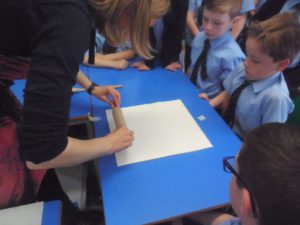
(10). Very carefully, lift a corner of the paper to reveal the print.
Helen enjoyed that so much, she decided to show the children just one more time:

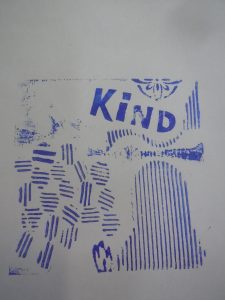
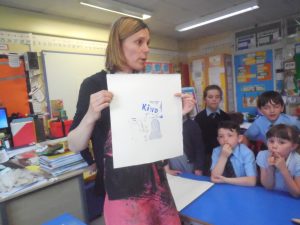
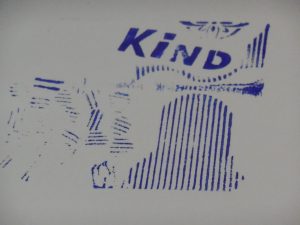
Helen had previously explained that if you want to write a word, you have to make it back to front on the plate…….Tia said, “Like a mirror.”
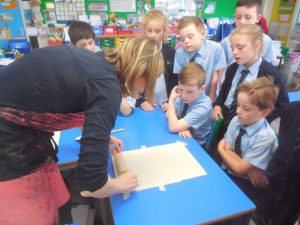
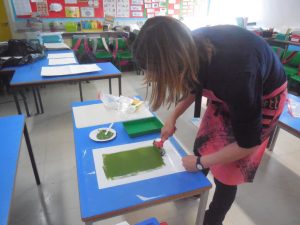
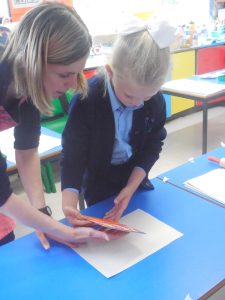
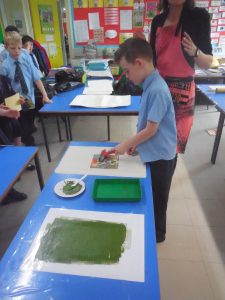
Helen prepared two more stations, pink and green.

Then it was time for the boys and girls to have a go, and they were very excited.
Kella was first to go.

Helen showed her how to roll the ink into the corner of the plate.
Rolling, rolling, rolling.
The moment of truth:
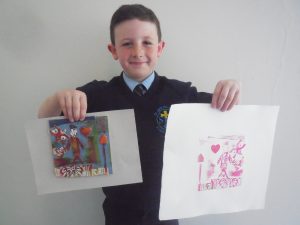
Well done Kella!
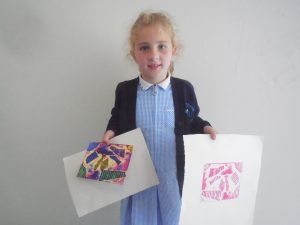
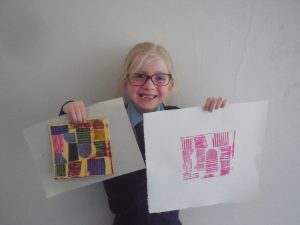
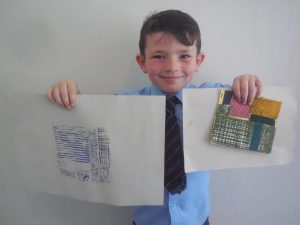
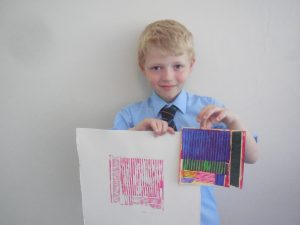
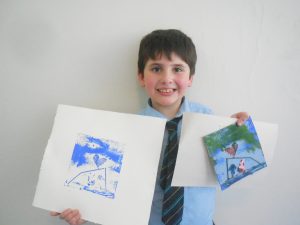
Everyone had an opportunity to choose his/her favourite colour and then it was ALL GO!
Stephen is very industrious!
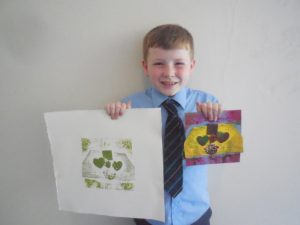
Great job Caitlinn!
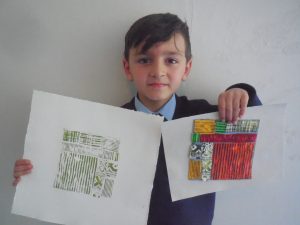
Conal chose green.
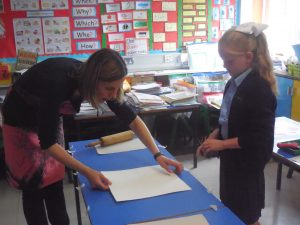
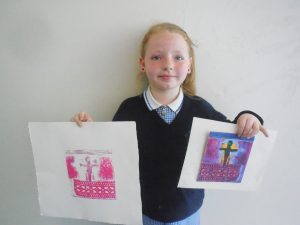
Laoise held the paper (Fabriano and very expensive.) for Olivia.

There were a lot of industrious children all over the place making super prints.
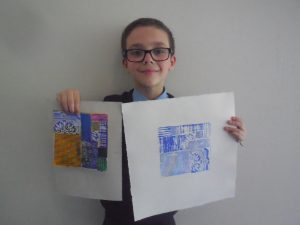
The plates looked just as good as the prints!!
 Ciaran wanted to use green.
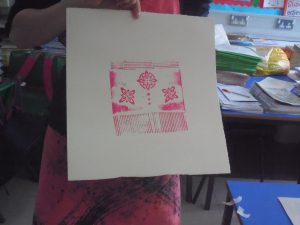
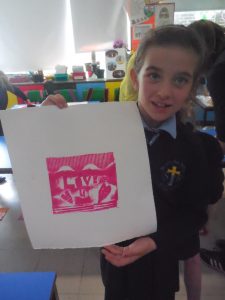
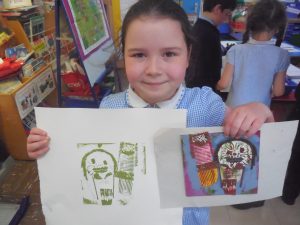
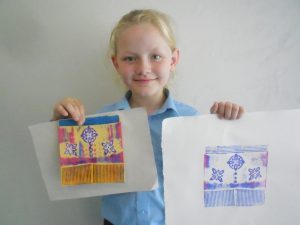
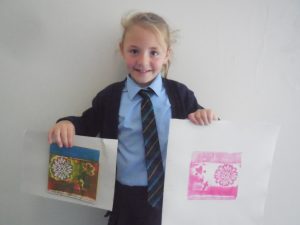
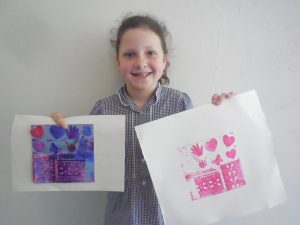
Look at Caitlinn‘s reaction to the double colour print!
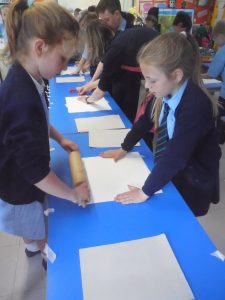
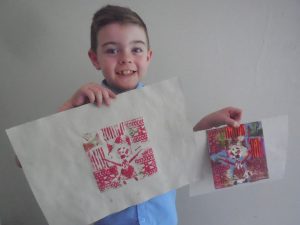
Such organisation. It went like clockwork: ROLL the ink over the plate – Place the fabriano on top of the plate. Tape it in place. gently rub or roll. Lift the paper off the plate, and hey presto! Another great print.
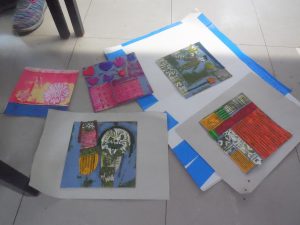
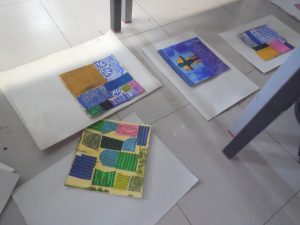
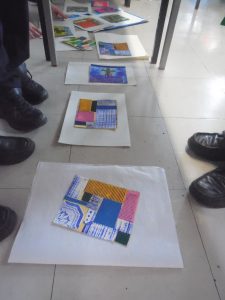
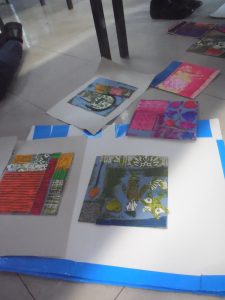
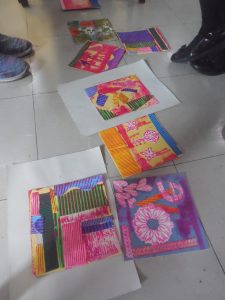
Finding a big enough space to leave the prints to dry, was difficult. However, we managed to find a suitable area “down the corridor.”
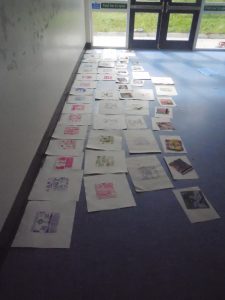

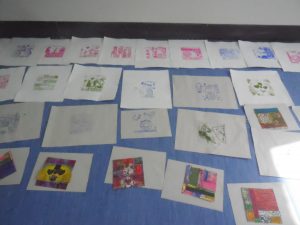
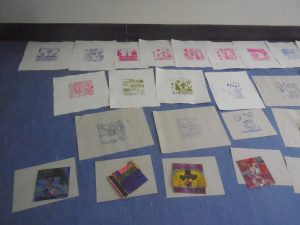
Helen said that it could take up to 4 days for the prints to dry.
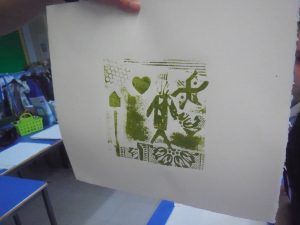
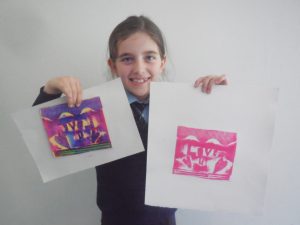
Wow! Look at that amazing creation. Fabulous! Did I mention it was mine?
Then Helen showed the children what a print would look like by adding one more colour to the plate, so the process started all over again. (Just as well that I found that large drying space, wasn’t it?)
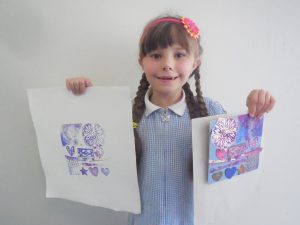
This is Cliodhna proudly showing her plate and print:
Everyone got a chance to make another print. Children who had finished their second print, made themselves busy by helping other children to carry the wet prints to the drying space. Then we had some super help from a band of excellent tidier-uppers. The furniture was moved back into its original position, and we had our Plenary.
Just before we started, we had to mention some facts about Pirates. This is our last WAU Topic this year, and everyone is now a pirate expert, as Helen soon discovered! After the boys and girls startled her with surprising facts about Grace O’Malley etc, and scaring her with facts about Blackbeard, we decided to have a think about what we had learned and enjoyed in today’s session – #14.
PLENARY SESSION:
What was your favourite thing about today?
TODAY’S SESSION:
SARAH: I liked the double print, using pink and blue.
KELLA and TIA also liked using two colours.
CAITLINN: I loved being allowed to roll the ink onto the print. I enjoyed the rolling action.
STEPHEN: I enjoyed learning about printing.
CLIODHNA enjoyed EVERYTHING!
SOPHIE said she had lots of fun and enjoyed making her prints.
RYAN: I liked using the ink. I never did it before.
PAUL: I liked making the plate.
TEACHER/ME: I loved learning a new skill today. The prints lying on the floor to dry, look like a lovely, big patchwork quilt.
PREVIOUS SESSIONS:
What was your favourite session – activity – theme during the VT year?
CONAL: I liked making the portraits.
CHARLIE: I had fun making the bridges. I really liked joining all the tables with them.
AOIFE liked making the bridges too.
EIMEAR: I liked making the cuboids that are hanging on the ceiling. It was like problem solving and discovery.
LAOISE: I liked making the den with the tables and chairs and tubes and glittery thing (material). I liked making the hands on the tables too.
OLIVIA: I liked the construction and working in groups.
OISIN: My favourite was the bridges.
RONAN: I liked making the sculptures with spaghetti.
EVERYONE liked making the willow circle!
HELEN said that she liked the session when everyone talked about their beliefs. She said that it is difficult for younger people/children to explain their ideas about God, Jesus, church, praying etc. She loved the words the children used to describe their feelings.

Helen asked everyone to take care of the willow circle, as she wouldn’t be back to St John the Baptist until the new school year starts. We promised to send photos of how it is growing.

We presented Helen with a card and a gift, and wished her a lovely Summer, and a safe journey back to Goatstown. She told us that she has just taken occupancy of a new studio, and showed some photographs (to the teacher). It looks very beautiful, with amazing windows which will let in lots of light.
GOOD LUCK HELEN, AND THANK YOU FOR BEING OUR GUIDE THIS YEAR!


Friday 9 June, 2017.
We wanted to find out more about Collagraphy and Fabriano, so the teacher went on to YouTube and found some very interesting videos, images and information.

Look at how the leaf veins are so perfectly printed!

The texture is so beautiful.

What a beautiful print by Angie Mitchum.
.jpg&psig=AFQjCNGCfGYLnukMeBudB3hKq_B7dSBMWw&ust=1497304760844622)
This is what the town of Fabriano looks like!
We discovered this quotation in a very old book:
” Rags make paper,
Paper makes money,
Money makes banks,
Banks make loans,
Loans make beggars,
Beggars make rags.”

We found this really old image of how paper was made (from rags) long ago.
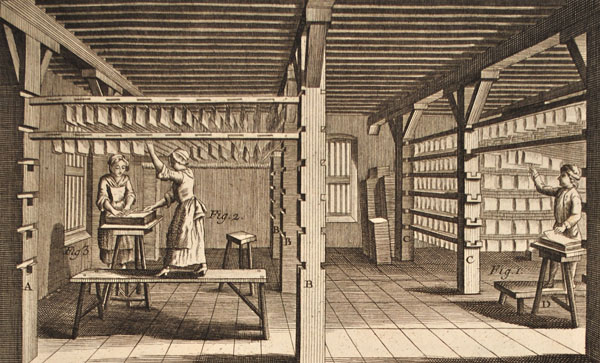
Hanging the paper to dry.

Making paper in the traditional way.


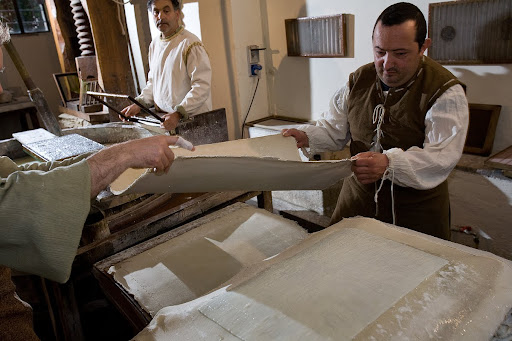
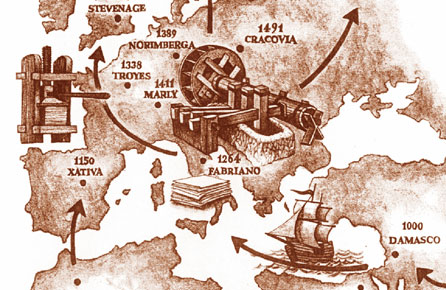
We also watched some tutorials on how to make paper and prints. We saw an old map showing where Fabriano paper making started, and how it got sent to other countries.
FINALLY:
We were so happy to find that all the prints were dry. What should we do with them?
- Put them together to make a giant print collection.
- Put each one in a frame and display them together somewhere in the school so that everyone can see them.
- Frame each one and give them to Dads, Grandads, or Uncles, as a gift for Father’s Day. (Next Sunday – 18 June)
GOODBYE FROM MRS HARRIOTT, THE BFG and P3JH.
IT’S BEEN A GREAT YEAR.

LOTS MORE TO COME IN 2017/2018!